
Key Takeaway: Proper operation and maintenance of a cardboard baler optimize throughput, safety, and equipment longevity. Monitor fill indicators, follow safe removal and changeover procedures, and adopt efficient loading techniques to maintain production flow. Most balers complete a full bale cycle in 2–5 minutes, depending on model and operator efficiency.
1. Identifying When the Baler Is Full
Cardboard balers rely on clear indicators and safe operating practices to prevent jamming, ensure uniform bale formation, and protect operator safety. Recognizing fullness promptly maximizes efficiency and avoids overloading.
1.1 Visual Fill Indicators
- Load Door or Hopper Window: Many vertical balers feature a transparent hopper window or opening at the front. When cardboard reaches the top of this window, the press ram has minimal travel left—time to compress.
- Level Marks: Painted or etched lines on the chamber walls indicate optimal fill heights. Aim to fill between the minimum and maximum level marks. Exceeding the top line risks incomplete compaction or crushing of the feed door.
1.2 Pressure or Force Gauges
- Hydraulic Pressure Gauge: Mounted on the baler control panel, this gauge registers the pressure required to press the cardboard. A sudden spike or reaching the manufacturer’s “bale ready” pressure means the chamber is full. Consult the manual’s recommended bale pressure (often 1,500–3,000 psi).
- Force-Limit Switch: Some balers include a force-limiting switch, halting the cycle when preset pressure is reached. An illuminated light or audible alarm usually accompanies this.
1.3 Cycle-Count Methods
- Standard Cycle Practice: Experienced operators load and compact in consistent batches. For instance, on a mid-range vertical baler, three to five standard loading cycles typically yield a full bale. Keep a production log to refine this count for your facility.
- Weight Monitoring: Portable scales under the discharge area can approximate bale weight. When consecutive bales approach target weight (e.g., 500–800 lb for a 1×1×1.5 yd bale), the chamber is effectively full at each cycle.
1.4 Safety Interlocks
- Interlocked Doors: Feed doors disable the ram when open. If the baler refuses to operate after loading, the chamber is likely full or a door is not fully latched.
- Light Curtains or Photo Eyes: Advanced models use photoelectric sensors to detect fill level. A blocked beam signals fullness and prevents further feeding until bale removal.
2. Removing a Cardboard Bale from a Box Crusher
A box crusher (or pre-crusher) reduces large boxes to manageable pieces before baling. Removing accumulated crushed cardboard ensures smooth downstream baling.
2.1 Preparation and Safety
- Lockout/Tagout (LOTO): Disconnect power to the box crusher. Follow your facility’s LOTO procedures—turn off the main disconnect and attach a lock and tag detailing who last worked on the machine.
- Personal Protective Equipment (PPE): Wear cut-resistant gloves, safety boots, eye protection, and a hard hat if overhead clearance is limited.
2.2 Clearing the Discharge Chute
- Open Access Door: Release latches on the crusher’s side panel or front door.
- Manual Extraction: Use a flat shovel or paddle to pry lodged cardboard toward the exit. Avoid reaching hands into pinch points.
- Vacuum Assistance: Industrial shop vacuums with extension wands can pull smaller fragments without manual digging.
2.3 Inspecting and Cleaning
- Blockage Check: Verify that no debris remains near the rotor or shear plate.
- Lubrication Points: Wipe away dust, then apply grease or oil to bearings and hinges as specified in the operator’s manual.
- Reassemble and Test: Close all doors, remove LOTO tags, and restore power. Run a brief empty cycle to ensure smooth operation before reintroducing material.
3. Changing a Cardboard Baler (Routine Maintenance and Component Replacement)
Routine maintenance, including changing wear parts and hydraulic fluids, prolongs baler life and maintains bale quality.
3.1 Preventive Maintenance Schedule
- Daily: Inspect for leaks, unusual noises, and debris in the chamber.
- Weekly: Check hydraulic fluid levels, pressure gauge calibration, and safety interlocks.
- Monthly: Grease bearings, inspect tether cables on doors, and test emergency stops.
- Annually: Replace hydraulic fluid, filter elements, and wear plates.
3.2 Changing Hydraulic Fluid and Filters
- Warm-Up: Run a short press cycle to warm fluid, improving drainage.
- Fluid Drain: Position a catch pan under the reservoir drain. Remove the drain plug; allow full drainage.
- Replace Filters: Unscrew in-line filter housings. Install new filters per OEM specifications.
- Refill Fluid: Add manufacturer-recommended hydraulic oil to the fill port. Avoid overfilling; use sight glass or dipstick to verify.
- Bleed System: Operate the ram through full strokes with no load until fluid flows smoothly without air pockets.
3.3 Replacing Wear Plates and Cutting Blades
- Wear Plates: Located on the bottom of the chamber or platen face. Unbolt old plates and install new, high-strength steel plates. Torque bolts to spec.
- Cutting Shear: If your baler has an integrated shear for trimming wire ties, replace blades when edges dull or chip.
- Ram Seals: Replacing seals prevents leaks. Don’t reuse old O-rings—select correct cross-section and durometer.
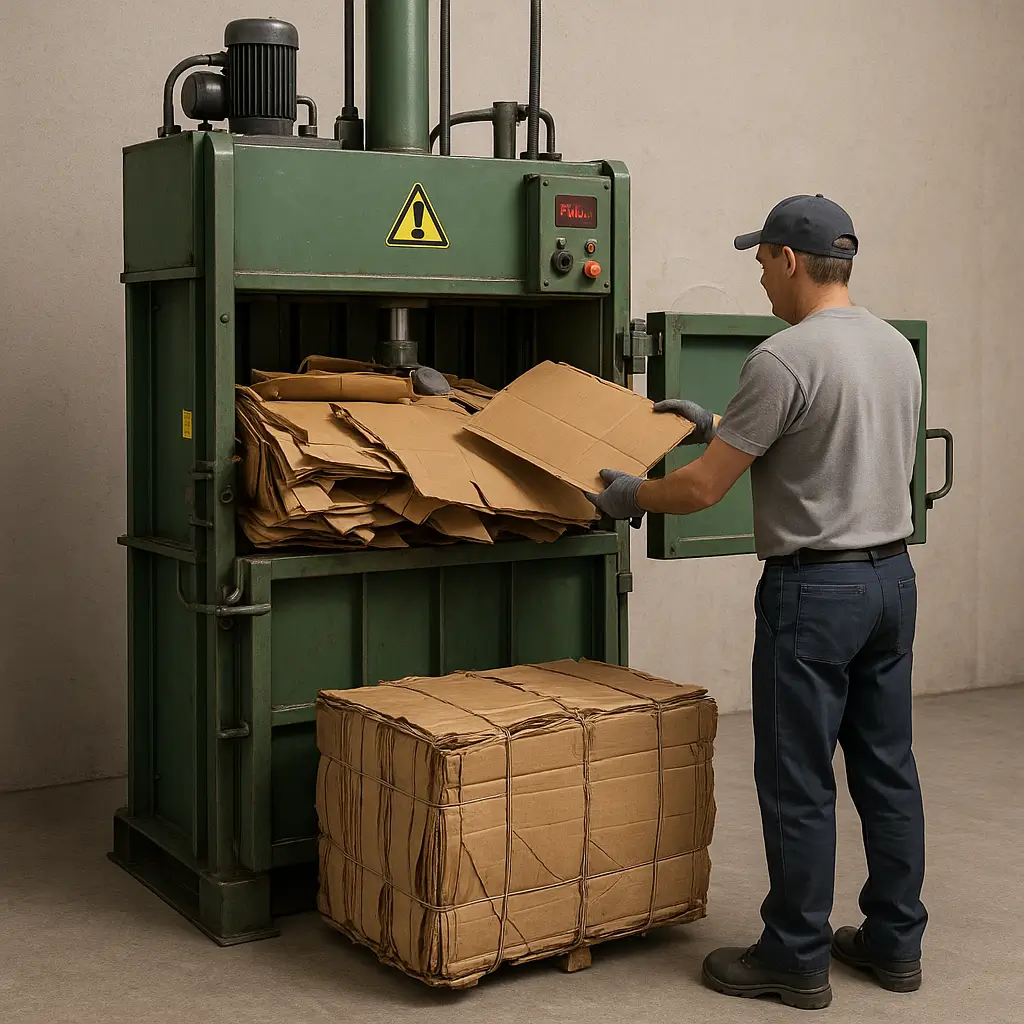
4. Efficiently Loading Cardboard into the Baler
Streamlined loading reduces cycle time and operator fatigue.
4.1 Pre-Processing Cardboard
- Flatten and Stack: Use a carton crusher or manually flatten boxes. Stack in uniform bundles (e.g., 24″×24″).
- Remove Contaminants: Discard shrink wrap, tape, and food residue. Clean cardboard produces stronger bales.
4.2 Loading Techniques
- Front-Center Loading: Stand directly in front of the hopper. Feed bundles squarely to prevent skewed stacking, which can cause jams.
- Sequential Overlap: Overlap layers by half a bundle width. This interlocks the material, yielding a denser, more stable bale.
- Load Height Management: Keep each load below the top-level marking; this ensures the ram can compact evenly and avoids spillage.
4.3 Ergonomic Practices
- Mechanical Aids: Use hydraulic lift tables or scissor lifts to raise heavy stacks to waist height.
- Team Lifting: For bulky bundles, coordinate lifts with a coworker to prevent strain.
- Rotation and Breaks: Rotate operators every hour and schedule brief micro-breaks to reduce fatigue.
5. Cycle Time: How Long Does It Take to Bale Cardboard?
Understanding cycle times helps plan labor allocation and throughput.
5.1 Typical Cycle Durations
- Vertical Balers (1–2 yd³ bales): Average cycle from first load to ejection: 2–3 minutes. Smaller models may run slightly faster; older or slower hydraulic systems may require up to 5 minutes per bale.
- Horizontal Balers (4–6 yd³ bales): Each cycle, including auto-feed and tie-off, takes 4–7 minutes, but processes higher volumes per cycle.
5.2 Factors Influencing Cycle Time
- Hydraulic Pump Capacity: Higher-gallon-per-minute (GPM) pumps increase ram speed and reduce dwell time.
- Operator Skill: Trained operators load and wire bales more quickly and evenly, shaving seconds off each cycle.
- Material Preparation: Pre-flattened, sorted cardboard loads faster than irregular, mixed-density board.
5.3 Throughput Calculation Example
For a standard vertical baler:
- Average cycle: 3 min
- Operating time: 480 min (8 hr shift)
- Maximum bales per shift: 160 bales (480 min ÷ 3 min)
- If each bale weighs 600 lb, total material baled: 96,000 lb or 48 tons per shift.
6. Conclusion and Best Practices
- Monitor fill level using visual, mechanical, or electronic indicators to prevent overloading.
- Follow strict LOTO and PPE protocols when clearing box crushers or performing maintenance.
- Adhere to preventative maintenance schedules to sustain baler performance and safety.
- Optimize loading through pre-processing, ergonomic aids, and proper stacking for denser bales.
- Plan throughput based on your baler’s cycle time and manpower to meet operational goals.
By integrating these guidelines, facilities can achieve safer, faster, and more reliable cardboard baling operations, reducing waste handling costs and enhancing recycling efficiency.
Leave a Reply