
Key Takeaway: Constructing a DIY cardboard baler is an achievable project that can dramatically reduce waste volume, streamline recycling, and save costs. By carefully selecting materials, tools, and a suitable design—whether manual, hydraulic, or mechanical—you can build a safe, efficient baler tailored to your needs.
1. Introduction to Cardboard Balers
Cardboard balers are machines designed to compress and bind loose cardboard into dense, manageable bales. In commercial settings, balers reduce the volume of cardboard waste by up to 90%, facilitating transport, storage, and recycling. A homemade baler can provide similar benefits for small businesses, workshops, or even ambitious DIY enthusiasts at a fraction of the cost of commercial models.
2. Benefits of a Homemade Baler
Employing a self-built cardboard baler delivers several advantages:
- Cost Savings: Commercial balers range from $3,000 to $20,000; DIY versions can be built for under $1,000 in materials.
- Customization: Tailor bale size, compression force, and footprint to specific space and volume needs.
- Hands-On Learning: Gain practical experience with metal fabrication, hydraulics, or mechanical leverage.
- Sustainability: Encourage recycling and waste reduction by making baling convenient and accessible.
3. Types of Cardboard Balers
Choosing the right baler type is crucial. The most common homemade designs include:
- Manual Lever Baler
- Uses a long lever arm or screw-jack mechanism.
- Suitable for low volumes (up to 50 lbs per day).
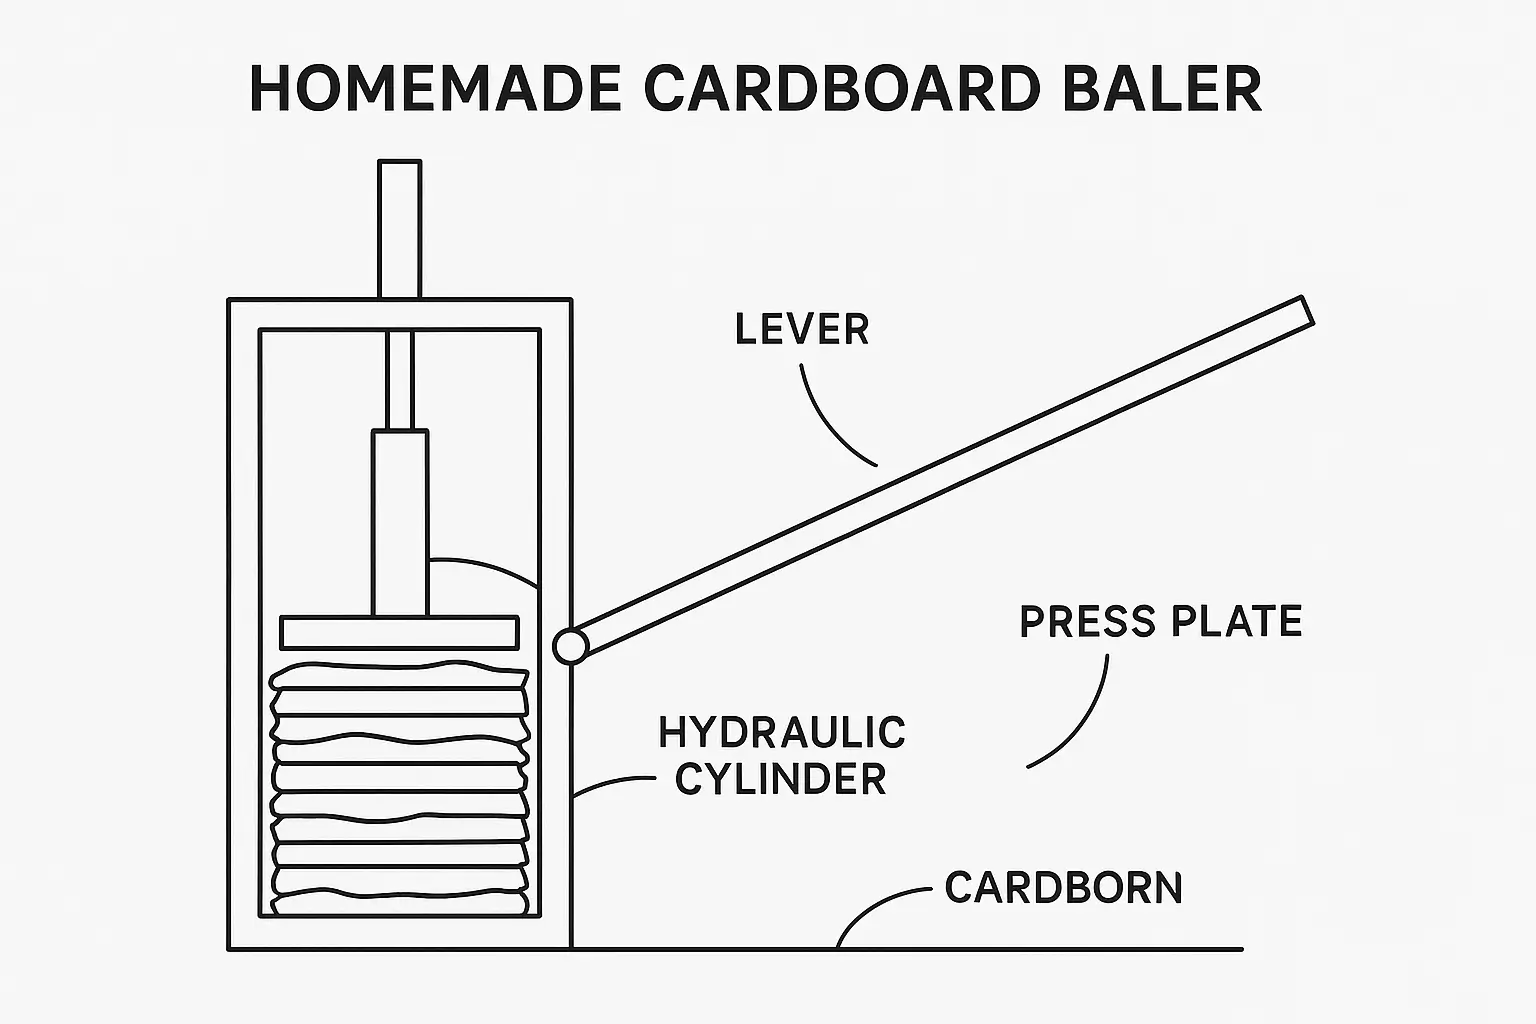
- Hydraulic Baler
- Employs a hydraulic cylinder powered by a pump or bottle jack.
- Handles moderate volumes (50–200 lbs per day).
- Mechanical Screw Press
- Utilizes a large threaded rod and rotating handle.
- Provides high compression force without hydraulics, ideal for workshops with metalworking tools.
4. Core Components and Materials
All baler designs share several essential components:
- Frame and Press Plate:
- Construct from steel square tubing (e.g., 2” × 2” × ¼”) for strength.
- Compression Mechanism:
- Lever arm, screw jack, or hydraulic cylinder (2–5 ton capacity).
- Bale Chamber:
- Steel sheet walls (12 ga to ¼ in thick) or welded tube frame to contain cardboard.
- Binding System:
- Bale wire or heavy-gauge strapping (for 500–1,000 lb tensile strength).
- Base and Support:
- Heavy steel plate or reinforced timber to anchor the unit.
- Fasteners and Bearings:
- Grade 8 bolts, flanged bearings for pivot points.
- Safety Guards:
- Perforated steel screens or welded mesh to protect hands.
5. Step-by-Step Construction Guide
5.1 Design and Planning
Begin by sketching your baler’s dimensions. A typical manual baler chamber is 24” × 24” × 30” (width × depth × height). Determine:
- Desired bale size: larger bales require stronger frames.
- Compression method: lever versus hydraulic.
- Available tools: welding equipment, drill press, welding table.
5.2 Cutting and Welding the Frame
- Cut Steel Tubing:
- Four vertical posts (30” length).
- Base perimeter rails (24” and 30”).
- Top rails mirroring base dimensions.
- Assemble Base:
- Weld rails into a rectangular base.
- Attach vertical posts at each corner.
- Install Top Frame:
- Weld top rails between the vertical posts.
- Ensure everything is square using a carpenter’s square.
- Add Cross Bracing:
- Weld diagonal braces on frame sides to prevent racking.
5.3 Fabricating the Press Plate
- Cut a plate of steel sheet matching chamber dimensions (24” × 24”).
- Weld a central “lifting lug” or attach a steel collar for the compression mechanism to push or pull.
- For hydraulic models, tack-weld a clevis bracket to accept the cylinder ram.
5.4 Installing the Compression Mechanism
Manual Lever Baler
- Pivot Pin:
- Drill ⅝” holes through top rails.
- Insert a hardened steel pin as a fulcrum.
- Lever Arm:
- Use a 48” steel bar.
- Weld one end to the press plate lug.
- Locking Mechanism:
- Drill holes along lever for a locking pin to hold pressure.
Hydraulic Baler
- Cylinder Mount:
- Weld a fixed bracket at the top center of the frame.
- Install the cylinder with its rod pointing down.
- Hydraulic Pump:
- Elbow pump handle to a convenient side mount.
- Connect high-pressure hose to the cylinder.
- Pressure Relief Valve:
- Ensure safe release of pressure when bales are complete.
5.5 Constructing the Bale Chamber and Door
- Chamber Walls:
- Weld steel sheet or angle iron panels to the inside of frame.
- Rear Door:
- Hinged at the bottom.
- Latch at the top to seal the chamber during compression.
- Discharge Ramp (Optional):
- Plate welded at the bottom edge allows easy bale removal.
5.6 Binding and Bale Ejection
- Binding Hooks:
- Weld steel loops or eye bolts on frame sides to guide wire or strapping.
- Ejection Plate (for Hydraulic Models):
- Attach to cylinder rod.
- Extends the plate beyond the chamber to push the finished bale out.
6. Safety Considerations
Building and operating a homemade baler involves serious hazards:
- Pinch Points: Keep hands clear of moving parts; install guard cages.
- Hydraulic Leaks: Use high-pressure rated hoses and fittings; inspect before each use.
- Structural Integrity: Use proper welding techniques; avoid brittle welds that can fracture.
- Personal Protective Equipment (PPE): Wear welding helmets, gloves, ear protection, and steel-toed boots.
- Emergency Release: Integrate a quick-release valve on hydraulic models.
7. Operating Procedure
- Load Cardboard:
- Open rear door; place flattened cardboard in the chamber.
- Close Door and Secure:
- Latch tightly to prevent leaks in pressure.
- Apply Compression:
- Pump the hydraulic handle or lever until the press plate firmly compresses the load.
- Lock Mechanism:
- Engage pin on manual lever balers or close hydraulic relief valve.
- Bind the Bale:
- Thread wire or strapping through binding hooks; tighten using a tensioning tool.
- Release Pressure:
- Slowly release lever or open relief valve for hydraulic units.
- Eject the Bale:
- Open rear door and slide or push out the finished bale.
8. Maintenance and Troubleshooting
- Regular Inspections:
- Check welds, tubing, and cylinder for cracks or deformation.
- Lubricate Pivot Points:
- Apply grease to the lever pivot and cylinder mounts monthly.
- Hydraulic Fluid:
- Replace every 6–12 months; monitor fluid level and top off as needed.
- Common Issues:
- Insufficient Compression: Check for leaks or worn seals.
- Frame Flexing: Reinforce with additional bracing.
- Binding Snags: Ensure hooks are properly aligned and smooth.
9. Cost Breakdown and Tools Required
A typical manual baler can be built for $300–$500; hydraulic models range $600–$1,000 in materials.
| Component | Estimated Cost |
|---|---|
| Steel tubing and plate | $200–$400 |
| Hydraulic cylinder & pump | $150–$300 |
| Fasteners and hardware | $50–$100 |
| Binding wire/strapping | $30–$50 |
| Bearings and pivot pins | $20–$50 |
| Total | $300–$1,000 |
Essential Tools:
- MIG or stick welder
- Angle grinder with cutting disc
- Drill press or hand drill
- Tape measure and carpenter’s square
- Wrenches and socket set
- Clamps and welding magnets
10. Alternative Commercial and Pre-Made Options
While DIY balers are cost-effective, commercially manufactured models offer features like automatic feeding, higher throughput, and warranty support. Prices typically start around $3,000 for basic manual balers to $15,000+ for fully automatic hydraulic machines.
11. Key Takeaway
Building a homemade cardboard baler is a rewarding project that yields significant operational savings, reduces environmental impact, and provides hands-on engineering experience. By following this comprehensive guide—carefully planning the design, sourcing quality materials, adhering to safety protocols, and executing precise fabrication—you can create a reliable, efficient baler perfectly suited to your workspace and recycling needs.
Leave a Reply